Drillholes in 3D
Inspect drill geometry, downhole assays, lithology, terrain, and related layers in a shared three-dimensional view.
Create or open a 3D view
- Start from a map containing the drilling you want to inspect.
- Select View in 3D and draw the requested area around the relevant drilling.
- Confirm the selection and allow the scene to prepare.
- Expand the drilling project in the left panel and focus on the holes of interest.
Start with a manageable area around a target. A regional map may include far more data than is useful for a single 3D inspection.
On Free and Starter, a 3D view of a map you own shows the public drillholes and map layers you have acquired on it, your own data, project names and outlines, and terrain and imagery. Creating the view uses no credits. You can run predictions on the acquired drillholes and export them from the view or as a cross section. Public 3D models are included with Professional.
Compare assays and lithology
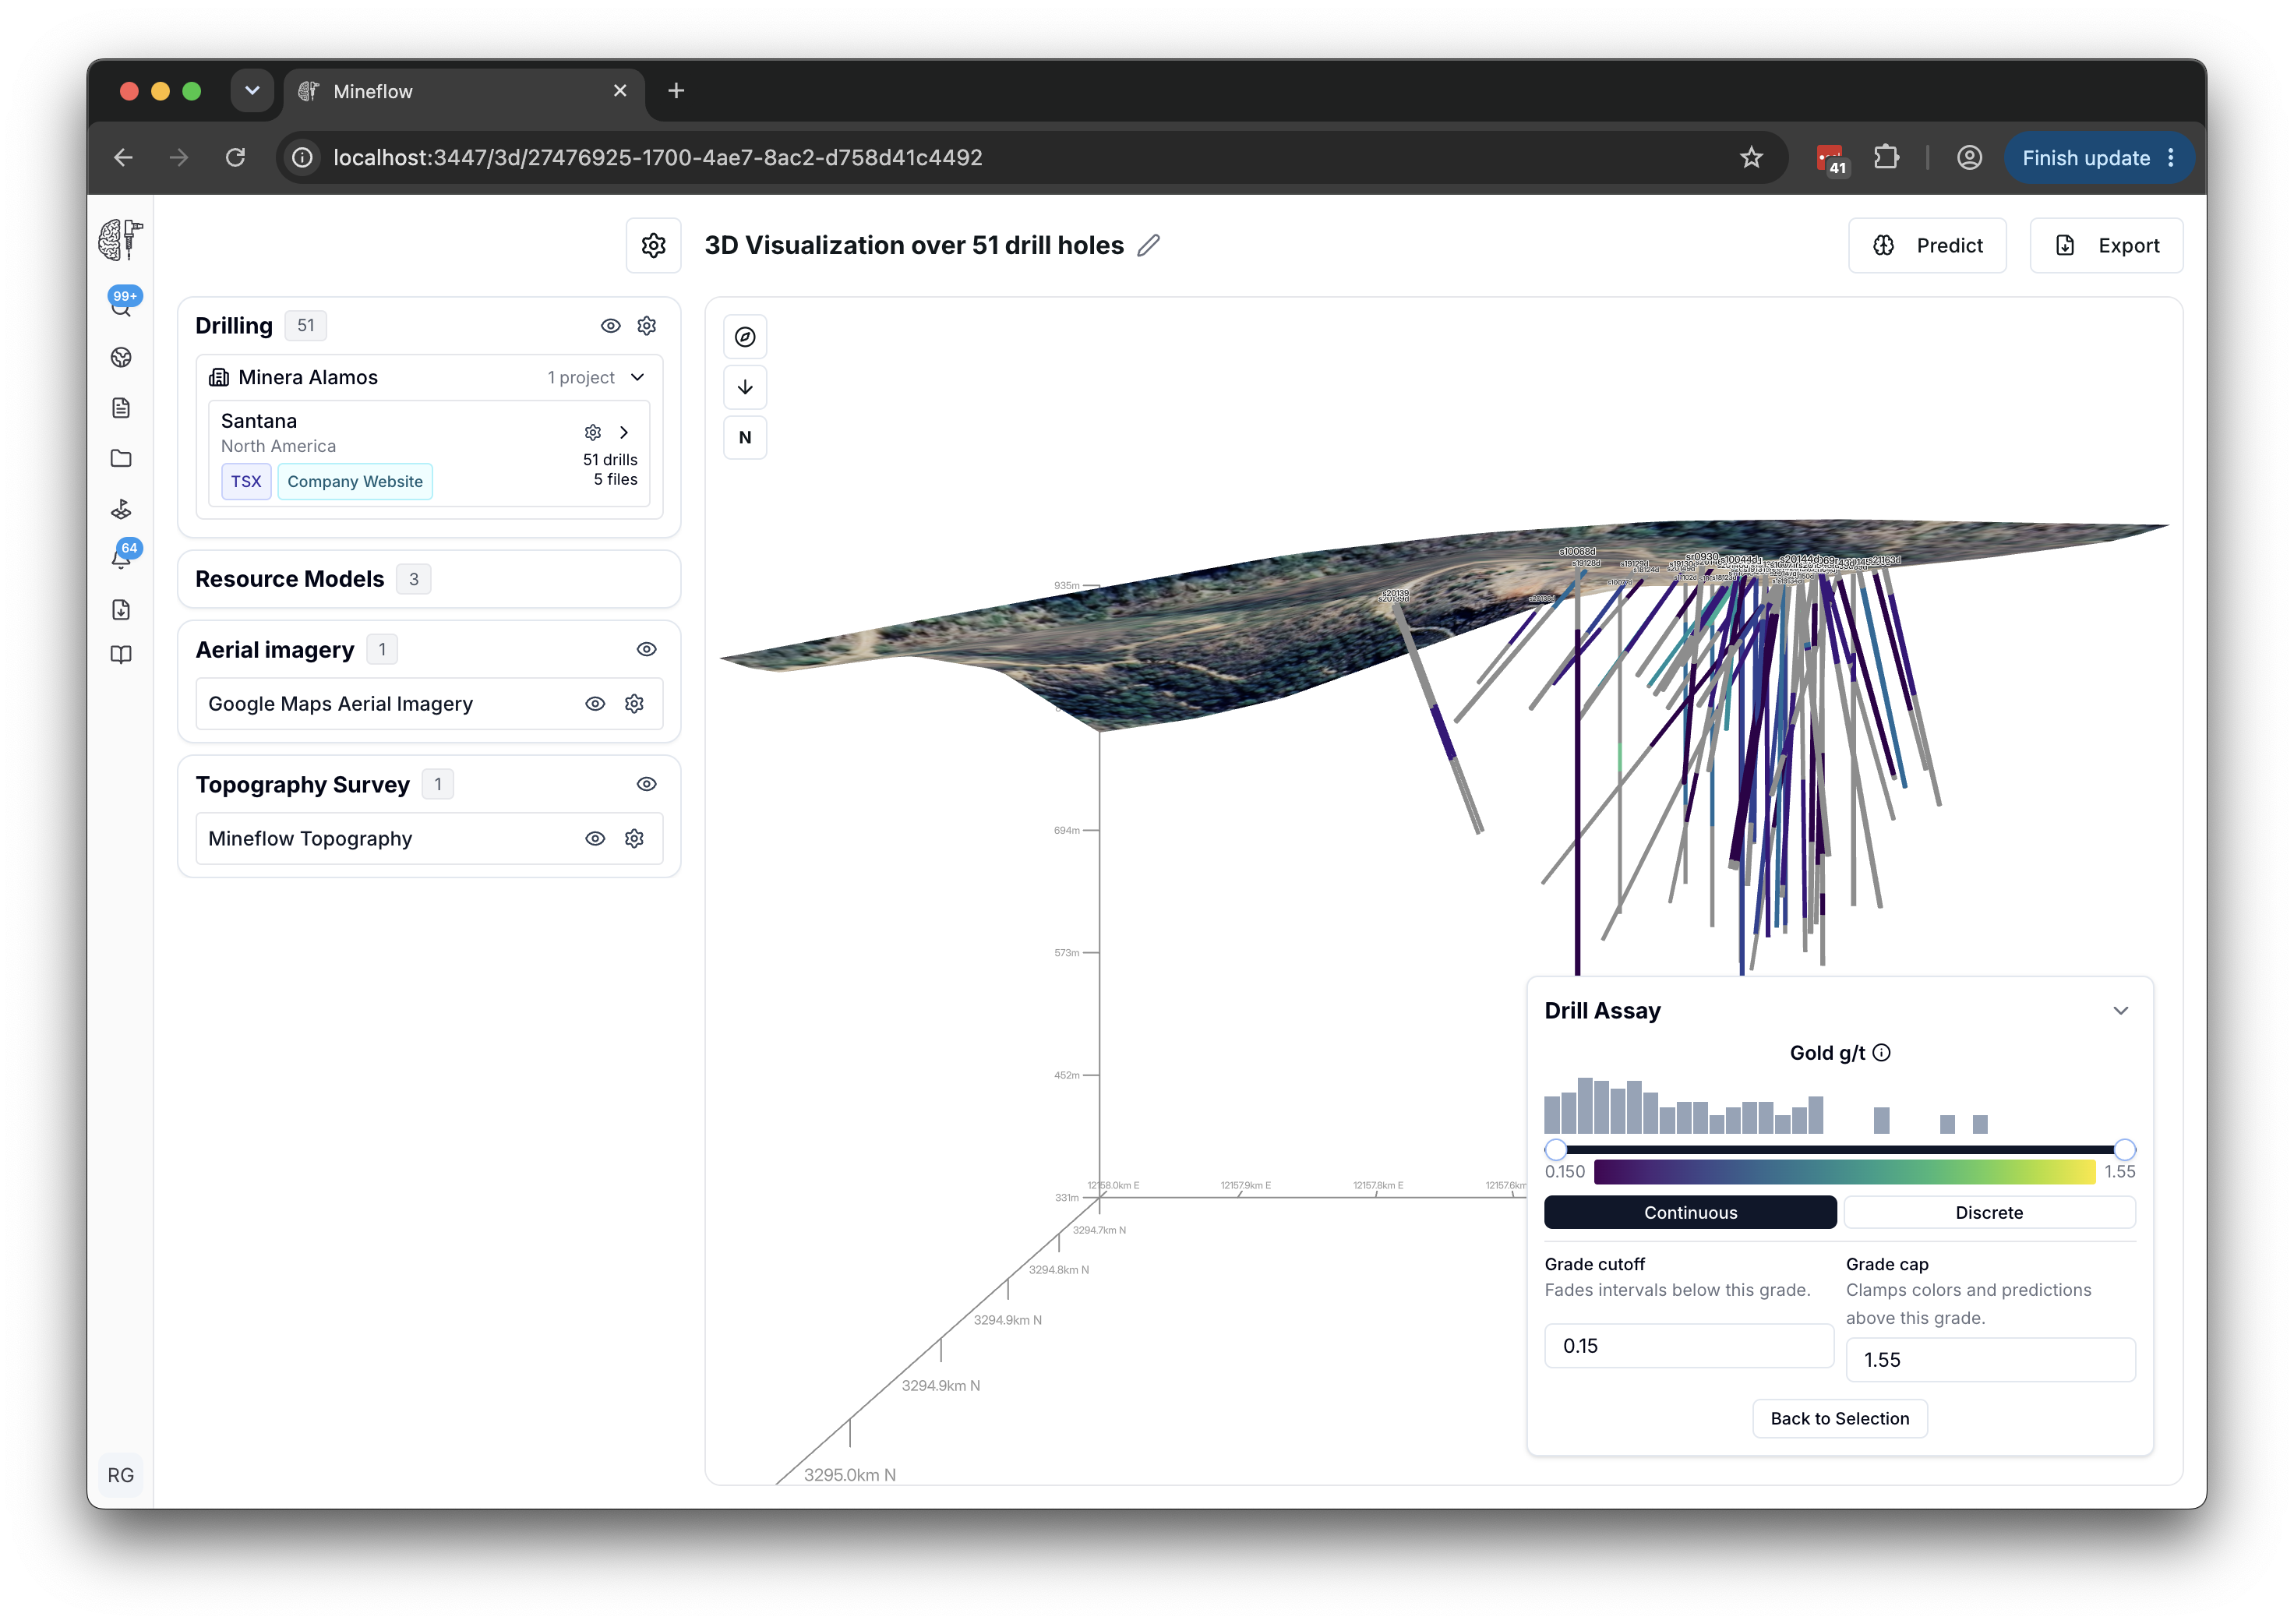
Use the drilling project controls to choose an assay element or lithology display. Read the legend and units, then inspect individual holes or intervals to understand the values behind the colours.
- Collars locate the top of each hole.
- Traces show the available downhole geometry.
- Assays colour measured intervals for the selected element and method.
- Lithology displays available geological logging along the hole.
Changing the colour range changes the display. Check any grade cap separately when it is used for a prediction, because that can change the input values to the calculation.
Navigate and control the view
Use the on-screen navigation controls and mouse or trackpad to rotate, pan, and zoom. Use a project's focus control to return to the drilling if you lose your place.
Open 3D View Settings to adjust the available display controls, including collars, drillholes, distance markers, background, and lighting. Hide layers that obscure the interpretation and allow detailed terrain or imagery to finish loading.
Create an interpretation or export
From the scene, you can create supported predictions, review earlier prediction runs, or export selected data and cross sections. Keep the original drilling visible when evaluating an estimated surface or block model. On Free and Starter, an export from a view of public data includes the drillholes you have acquired, your own data and the scene's terrain; public map layers export from a map export on Starter.